giovedì 25 dicembre 2014

Tutorial: Christmas decoration in cross-stitch.

PER LA VERSIONE IN ITALIANO CLICCA QUI

I have started to work cross stitch many years ago and surely its the manual work that I love most. Over the years I did several projects to gift to friends, but unfortunately I have no pictures of my creations.
Since I became a mum for the second time,  time is never enough to cope with all the family needs, and I gave up on cross-stitch until last month a friend told me that she was looking for a birth sampler, for the birth of her daughter. She didn’t know that cross-stitch is one of my passions, so I surprised her with a lovely present.

This was what I needed to get me started again. I took some time to organise all my cross stitch threads , needles and patterns and as it was December I decided to start with cross-stitching two Christmas decorations for my kids.


Personalised Christmas Decorations. 


Requirements:
  • styrofoam ball (circumference 30cm),
  • satined fabric,  
  • aida fabric, 
  • 50cm cord and some ribbon, 
  • thread and needle for cross-stitch, 
  • scissors, nailfile, cutter and sewing pins,
  • glue-gun.

Method: 

Insert a sharp cutter all around the circumference of the styrofoam ball, to form a sort of gap. It should be about 3mm deep. 

I found some red satin in my work box and I decided to use it.
By the way whenever I start a new creation, I always try to use material available at home, before buying new material. So I opted on red, but you can use other Christmas colours like gold, silver, green and blue. 

Next step is to measure the circumference of the ball and cut the material you have chosen in a circle with a diameter that measures half the ball's circumference plus 1cm. In my case the ball's circumference was 30cm, so my circle in fabric measured 16cm in diameter.
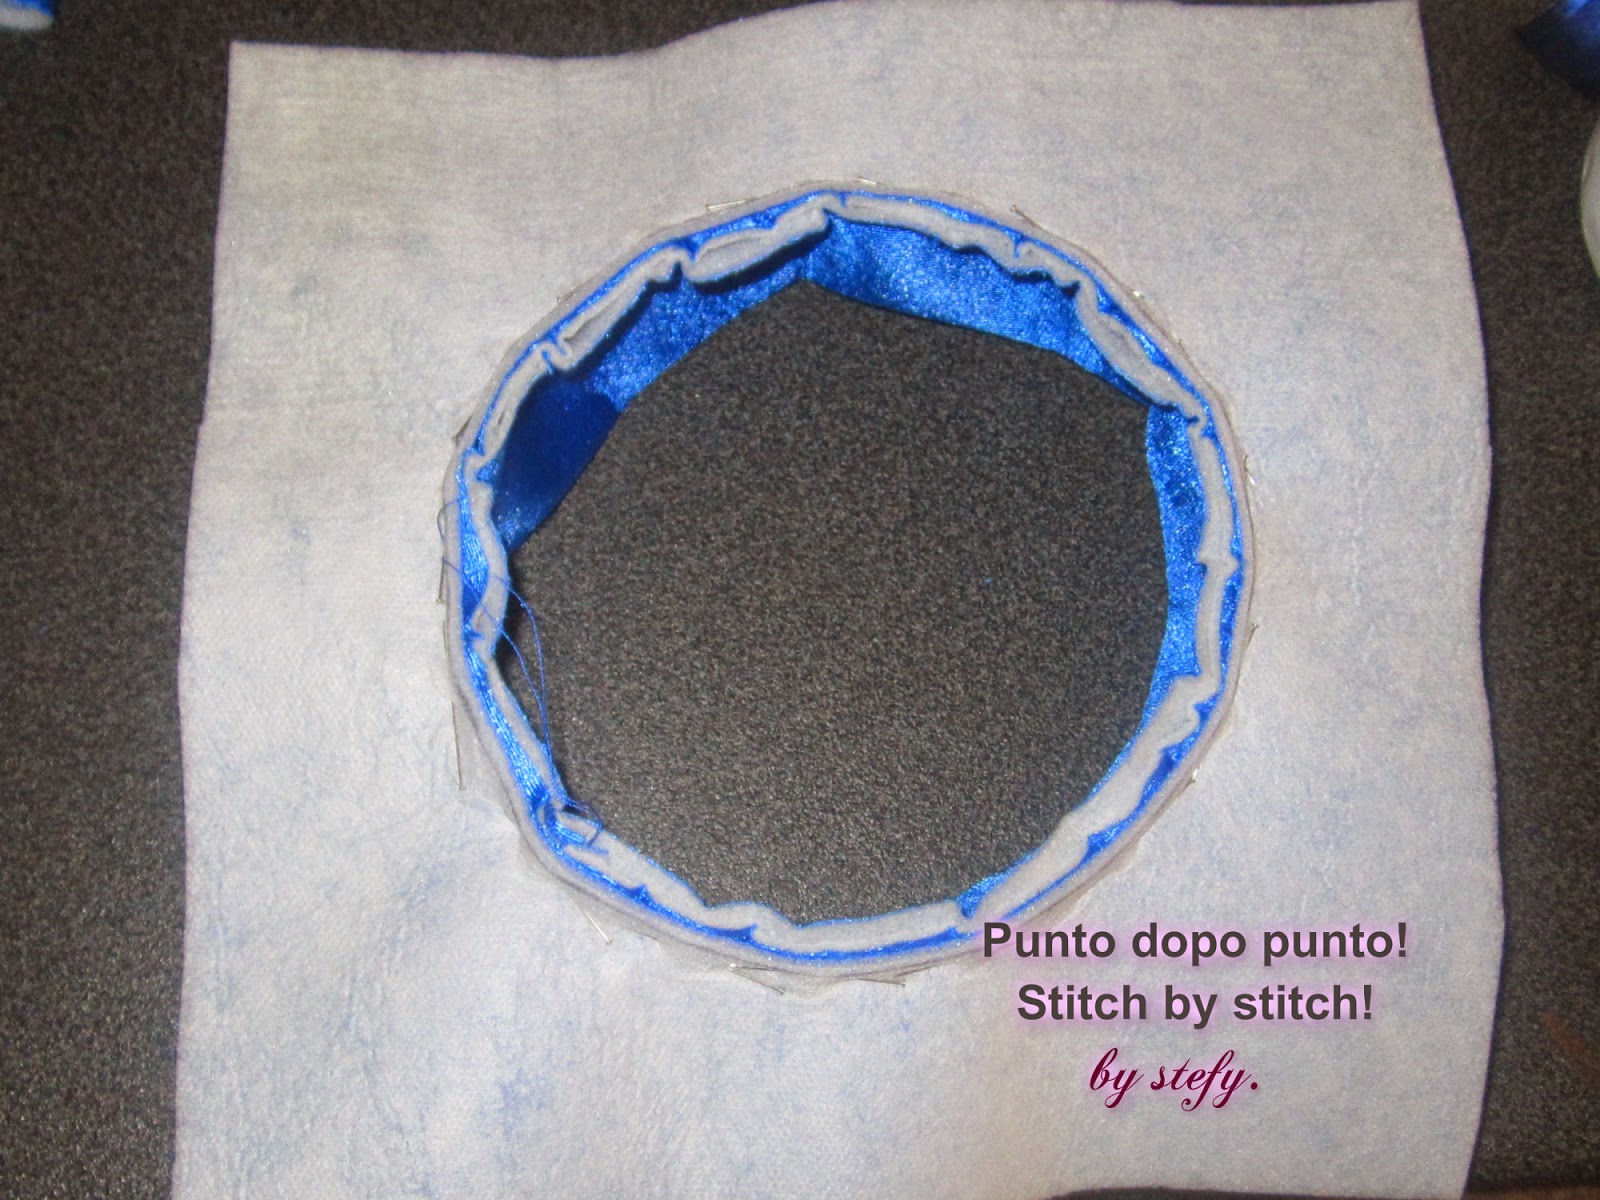
Now comes the tricky part. Pin the material on the top of the ball with some sewing pins and slowly start to insert the edge of the material in the gap you have created before, with a metal nail file. I inserted the material in four cardinal points and then slowly the rest of the material, trying to smooth the pleats as much as possible. Do not worry if you have little pleats, they will be later covered. 

Next step is to cut the aida fabric to the same measurement of the previous circle. Choose your cross stitch pattern and after finding the centre of the aida fabric, cross stitch it.

When you are satisfied with your work, repeat the same procedure you have used with the coloured material i.e. tuck in the edge of aida fabric in the gap. Cut off any excess material.

At the centre top I inserted a loop which I formed from some ribbon, in able to hang the ball.  To cover the gap where the fabric has been inserted, I used a red cord which I glued using the glue gun and finally a little red bow on top.


Hope you enjoy this and thanks for following.

POTETE LEGGERE LA VERSIONE IN ITALIANO QUI.

by stefy.


martedì 23 dicembre 2014

Tutorial: How to make a tassle.

per la versione in italiano, cliccate qui


A tassle is a decoration made from thread or wool.  Mostly tassles are used to decorate soft-furnishing like curtains, cushions etc and are also used on clothes, jewellery, hats and hoods.

We can create different sizes of tassles by using different thickness of thread or wool. 

I had to sew some degree hats with a tassle on the top (tutorial - how to sew a degree's hat),  and to save some money I decided to create my own tassles and luckily I also found in my work box, the exact colour of embroidery thread I needed.


Requirements:
  • embroidery thread or wool  (the thicker the thread, the thicker the tassle),
  • a piece of cardboard 6cm wide. The length has to be the same as your tassle's finished length.
  • scissors

Method:

Knot the thread around the cardboard's length.  Now you have to wrap the thread on the cardboard several times, until you reach the volume required.
My thread was not very thick and I wrapped it 50 times around the cardboard, even because I didn't desire a thick tassle.


When you reach the desired volume, cut the thread.  Leave the thread on the cardboard.


Now,  we have to form a cord from the same thread we are using. I created a plaided cord with 18 theads.  If  your thread is thicker or you are using wool,  reduce the threads to 12 or 6 (the number of threads you use, has to be divided in three parts, because we need three bunches of thread to form a plaid).

The length of the threads to form the plaid has to be 3 times the finished plaid.  For example:  if we need a plaid 6cm long, we have to cut the threads 18cm long.
Place these threads under the wrapped thread on the cardboard.  Pull until you reach two equal lengths and make a knot.


Separate the threads in three bunches and make a plaid.  When you reach the desired length, knot the thread to stop the plaid from opening.


Now you can take out the thread from the cardboard. Cut the edges at the lower part of the tassle, exactly at the centre.


The last step is to wrap the thread several times 1cm / 1,5cm under the top of the tassle.  Wrap the thread until you reach the desired thickness and length.   Knot the thread and cut the ends to the same length of the tassle.


And you tassle is ready to be hanged.

Visitate la versione in italiano: tutorial - come fare una nappa.

  Stefy.

lunedì 22 dicembre 2014

Tutorial - how to sew a degree's hat.


In Italy, it has lately became a tradition, that when kids finish their kindergarten school, they are awarded with an end of kindergarten certificate, called 'diploma'. For this occasion they are dressed like university graduates. Last year even my son has received his 'diploma', so I prepared for him and his classmates, a degree’s hat made in fabric.


It’s not difficult to create and I also published some photos for a better explanation.

FOR ITALIAN VERSION PLEASE CLICK HERE.


Requirements:

  • 30cm of foamfabric (fabric with a layer of thin foam already attached)
  • 1.5mtr bias satin ribbon 2cm wide, same colour of fabric,
  • Some cardboard same colour of fabric,
  • Scissors, sewing thread and needle, sewing pins,
  • Crochet thread to make a tassle,
  • Sewing machine,
  • Glue gun.


The measurements that I have used, are for 5 year old children with head’s circumference of about 49/51cm, but when I tried out the hat it also fitted me, cause it only has to be placed on the head.  I attached some elastic, so as not to loose the hat.


Method:

pic 1 (the circle is not in photo)

From the foamfabric (pic 1) cut:
  • two squares measuring 25cm
  • a rectangle 56x16cm. (pic 1)
  • a circle with diameter 16cm


pic 1a


From the cardboard (pic 1a) cut:
  • a square measuring 24cm
  • a circles with diameter 16cm.


On one of the squares on the wrong side of fabric, find the centre and draw a circle with diameter 13cm (pic 2).     Cut out the circle (pic 3).

pic 2

pic 3


Close the rectangle by sewing the short ends 1cm away from border, to form a ‘crown‘ roughly measuring 54cm (pic 4)

pic 4

Fold the crown lengthwise, in order to have the foamy part of the textile on the inside (pic 5)
pic 5

Next step to the attach the borders of the crown to the circular border we have prepared before.  Place the borders of the crown and insert them inside the circle’s border and pin in place.  Should the crown result a bit longer, make very little pleats to reduce the length.  Sew with sewing machine and when you’re done, snip the edges (pic 6)
 

pic 6

Now place the other square, on the square with the crown, wrong sides together and pin in place. Apply the bias tape all around the edges
,  taking extra care to the corners.  Sew bias type with sewing machine and then sew the corners with thread and needle, with little invisible stitches.

  
To obtain a rigid hat, insert the cardboard (square measuring 24cm) in the inside of the hat.  The easiest way to insert it, is by folding the corners as in pic 6 and 7.
pic 6


pic 7


Glue together the circles from foamfabric (foam on the inside) to the cardboard.  Glue to the inside of the crown, to have a neat finish.  When I prepared the hats,  I had a very tight deadline,  so I only glued the cardboard to the hat  (pic 8).
pic 8

To finish of the hat we have to attach a tassle either of the same colour or with a contrast colour.


If you wish to prepare the tassle follow my tutorial - how to make a tassle

Sew the tassle at the centre of the hat.


Thank you and see you next time!!

POTETE LEGGERE LA VERSIONE IN ITALIANO, QUI / for italian version click here..

Stefy